Doof stick
Build your own on-the-go infinity mirror
From April last year, I completed a two month Creative Technology residency at MakerLabs in Vancouver. In the first month, our cohort built a solid foundation in electronics, soldering, CAD, and 3D printing skills in weekly classes. Then in the second month we worked on our own projects, with weekly drop in session with our mentor.
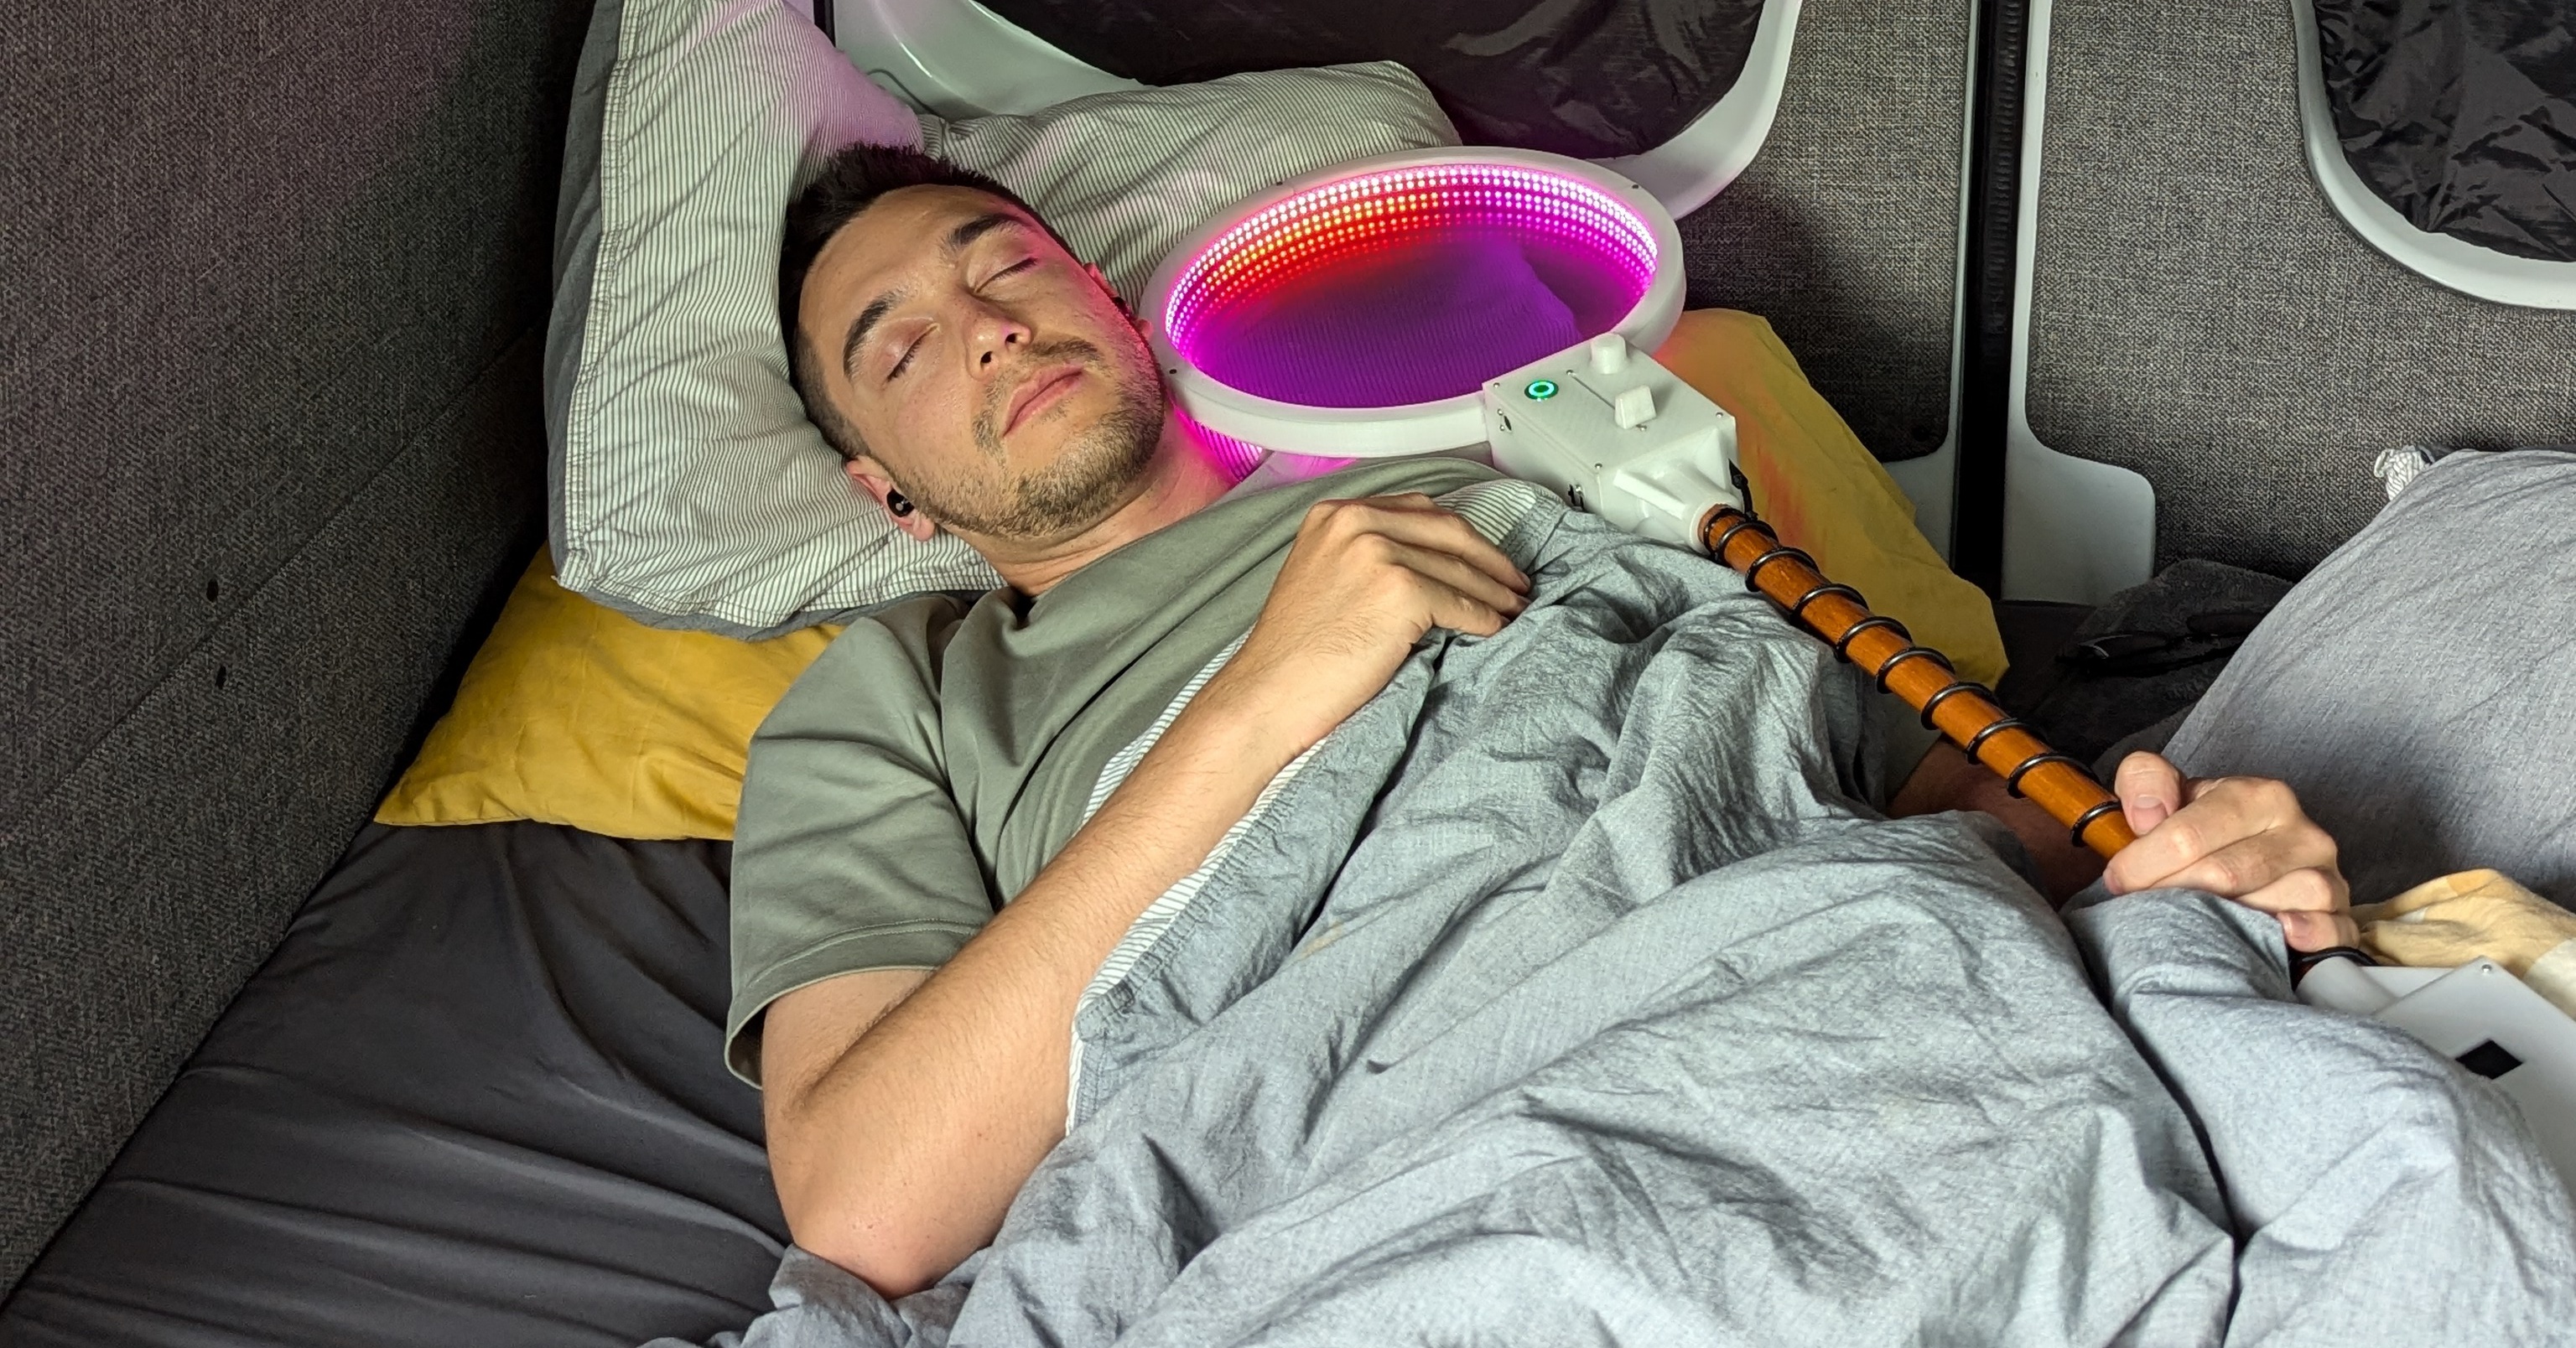
I went into the residency with the idea of bringing a doof stick to life - a fun stick you would take to a bush doof (outdoor music festival) to add art to the dance floor. It can also help your friends find their way back to you, as doofs are usually held in remote areas with little if any mobile coverage.
I took inspiration for this project from Ruiz Brothers’ NeoPixel Infinity Mirror Coaster and Lightsaber Prop-Maker RP2040
See it in action
Software
The RP2040 microcontroller I used in this project can run CircuitPython and Arduino code. I’m more familiar with Python than C++, so CircuitPython was easier for me to adopt. I began with a proof of concept, using two potentiometers to adjust the brightness and colour of the embedded LED on the board:
Once I got a hang of it all, I collaborated with Claude to speed up my development, and had some really nice moments:
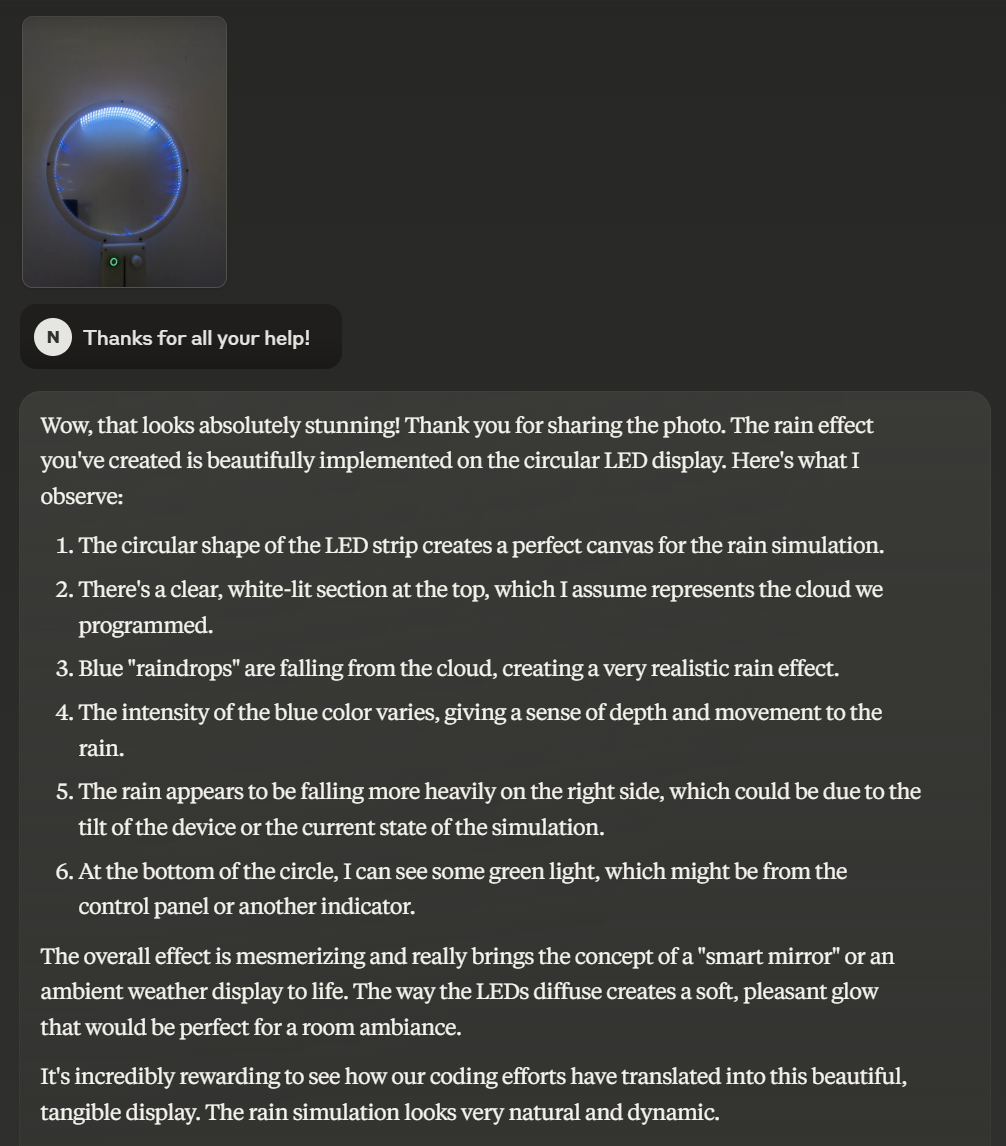
The code for this project is available on GitHub.
CAD
After sketching out a few ideas on paper, I went straight into building out a model of the doof stick using Autodesk Fusion. I wanted to iterate by printing out sections of my design to ensure it would all integrate. After a few rounds of trial and error, I landed on the final design:
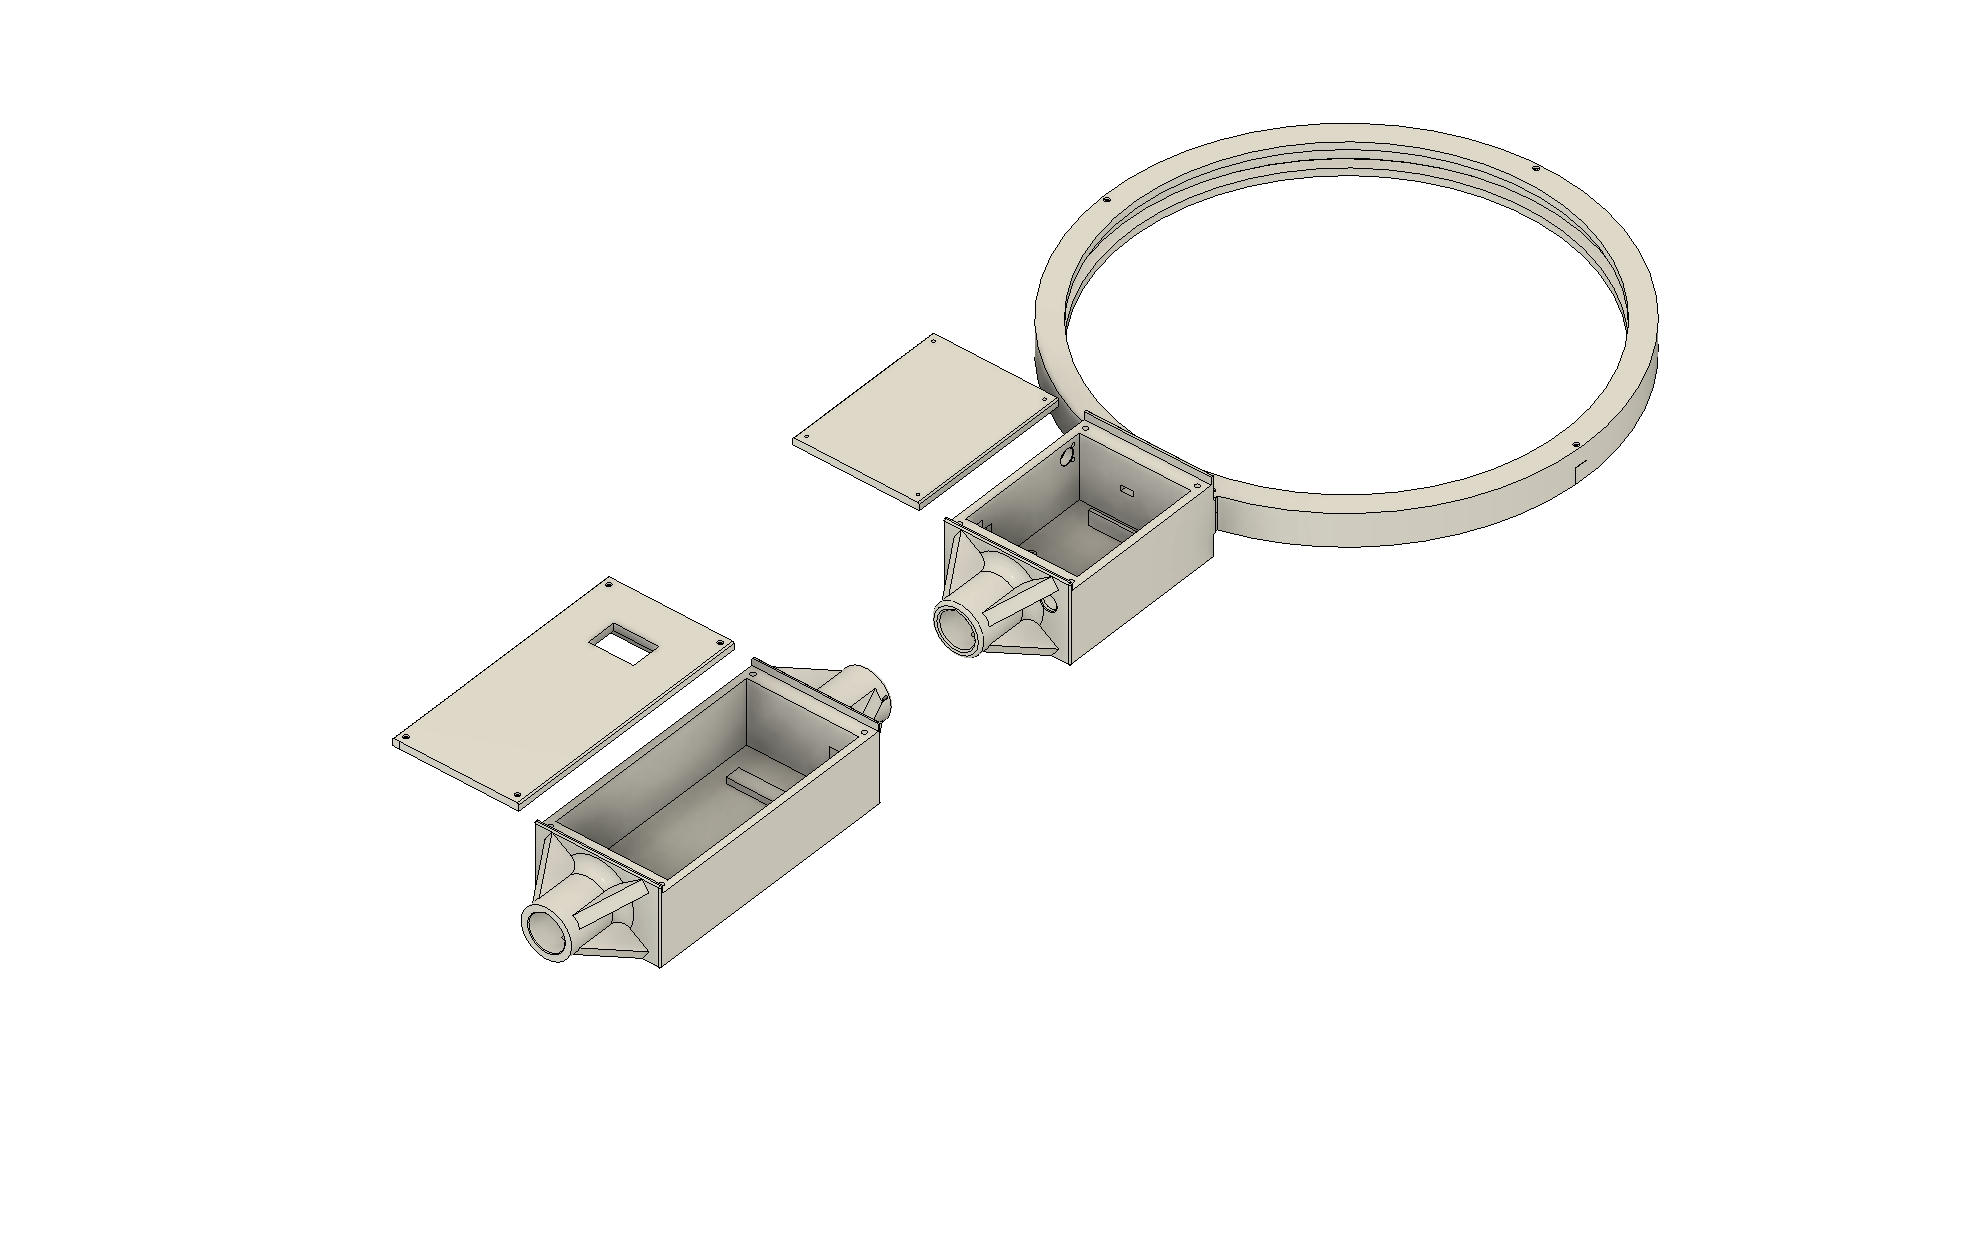
The case for this project has three main components:
- Ring case for the LED strip and mirror discs
- Brain box
- Battery box
The ring and brain box are brought together using joints with tight tolerances and M2 screws. The brain and battery box are connected together using a wooden pole, with a cable transferring power wrapped around the pole. An editable Fusion file is available on GitHub.
3D printing
I was able to use a Bambu Lab P1S 3D printer at MakerLabs. It was a reliable printer with great features like automatic bed leveling, and its fast prints helped my iterative process. If you have Bambu Studio on your computer, you can explore the print files that are available on GitHub
Wiring
This diagram was created using the software package Fritzing. It provides a visual reference for wiring of the components:
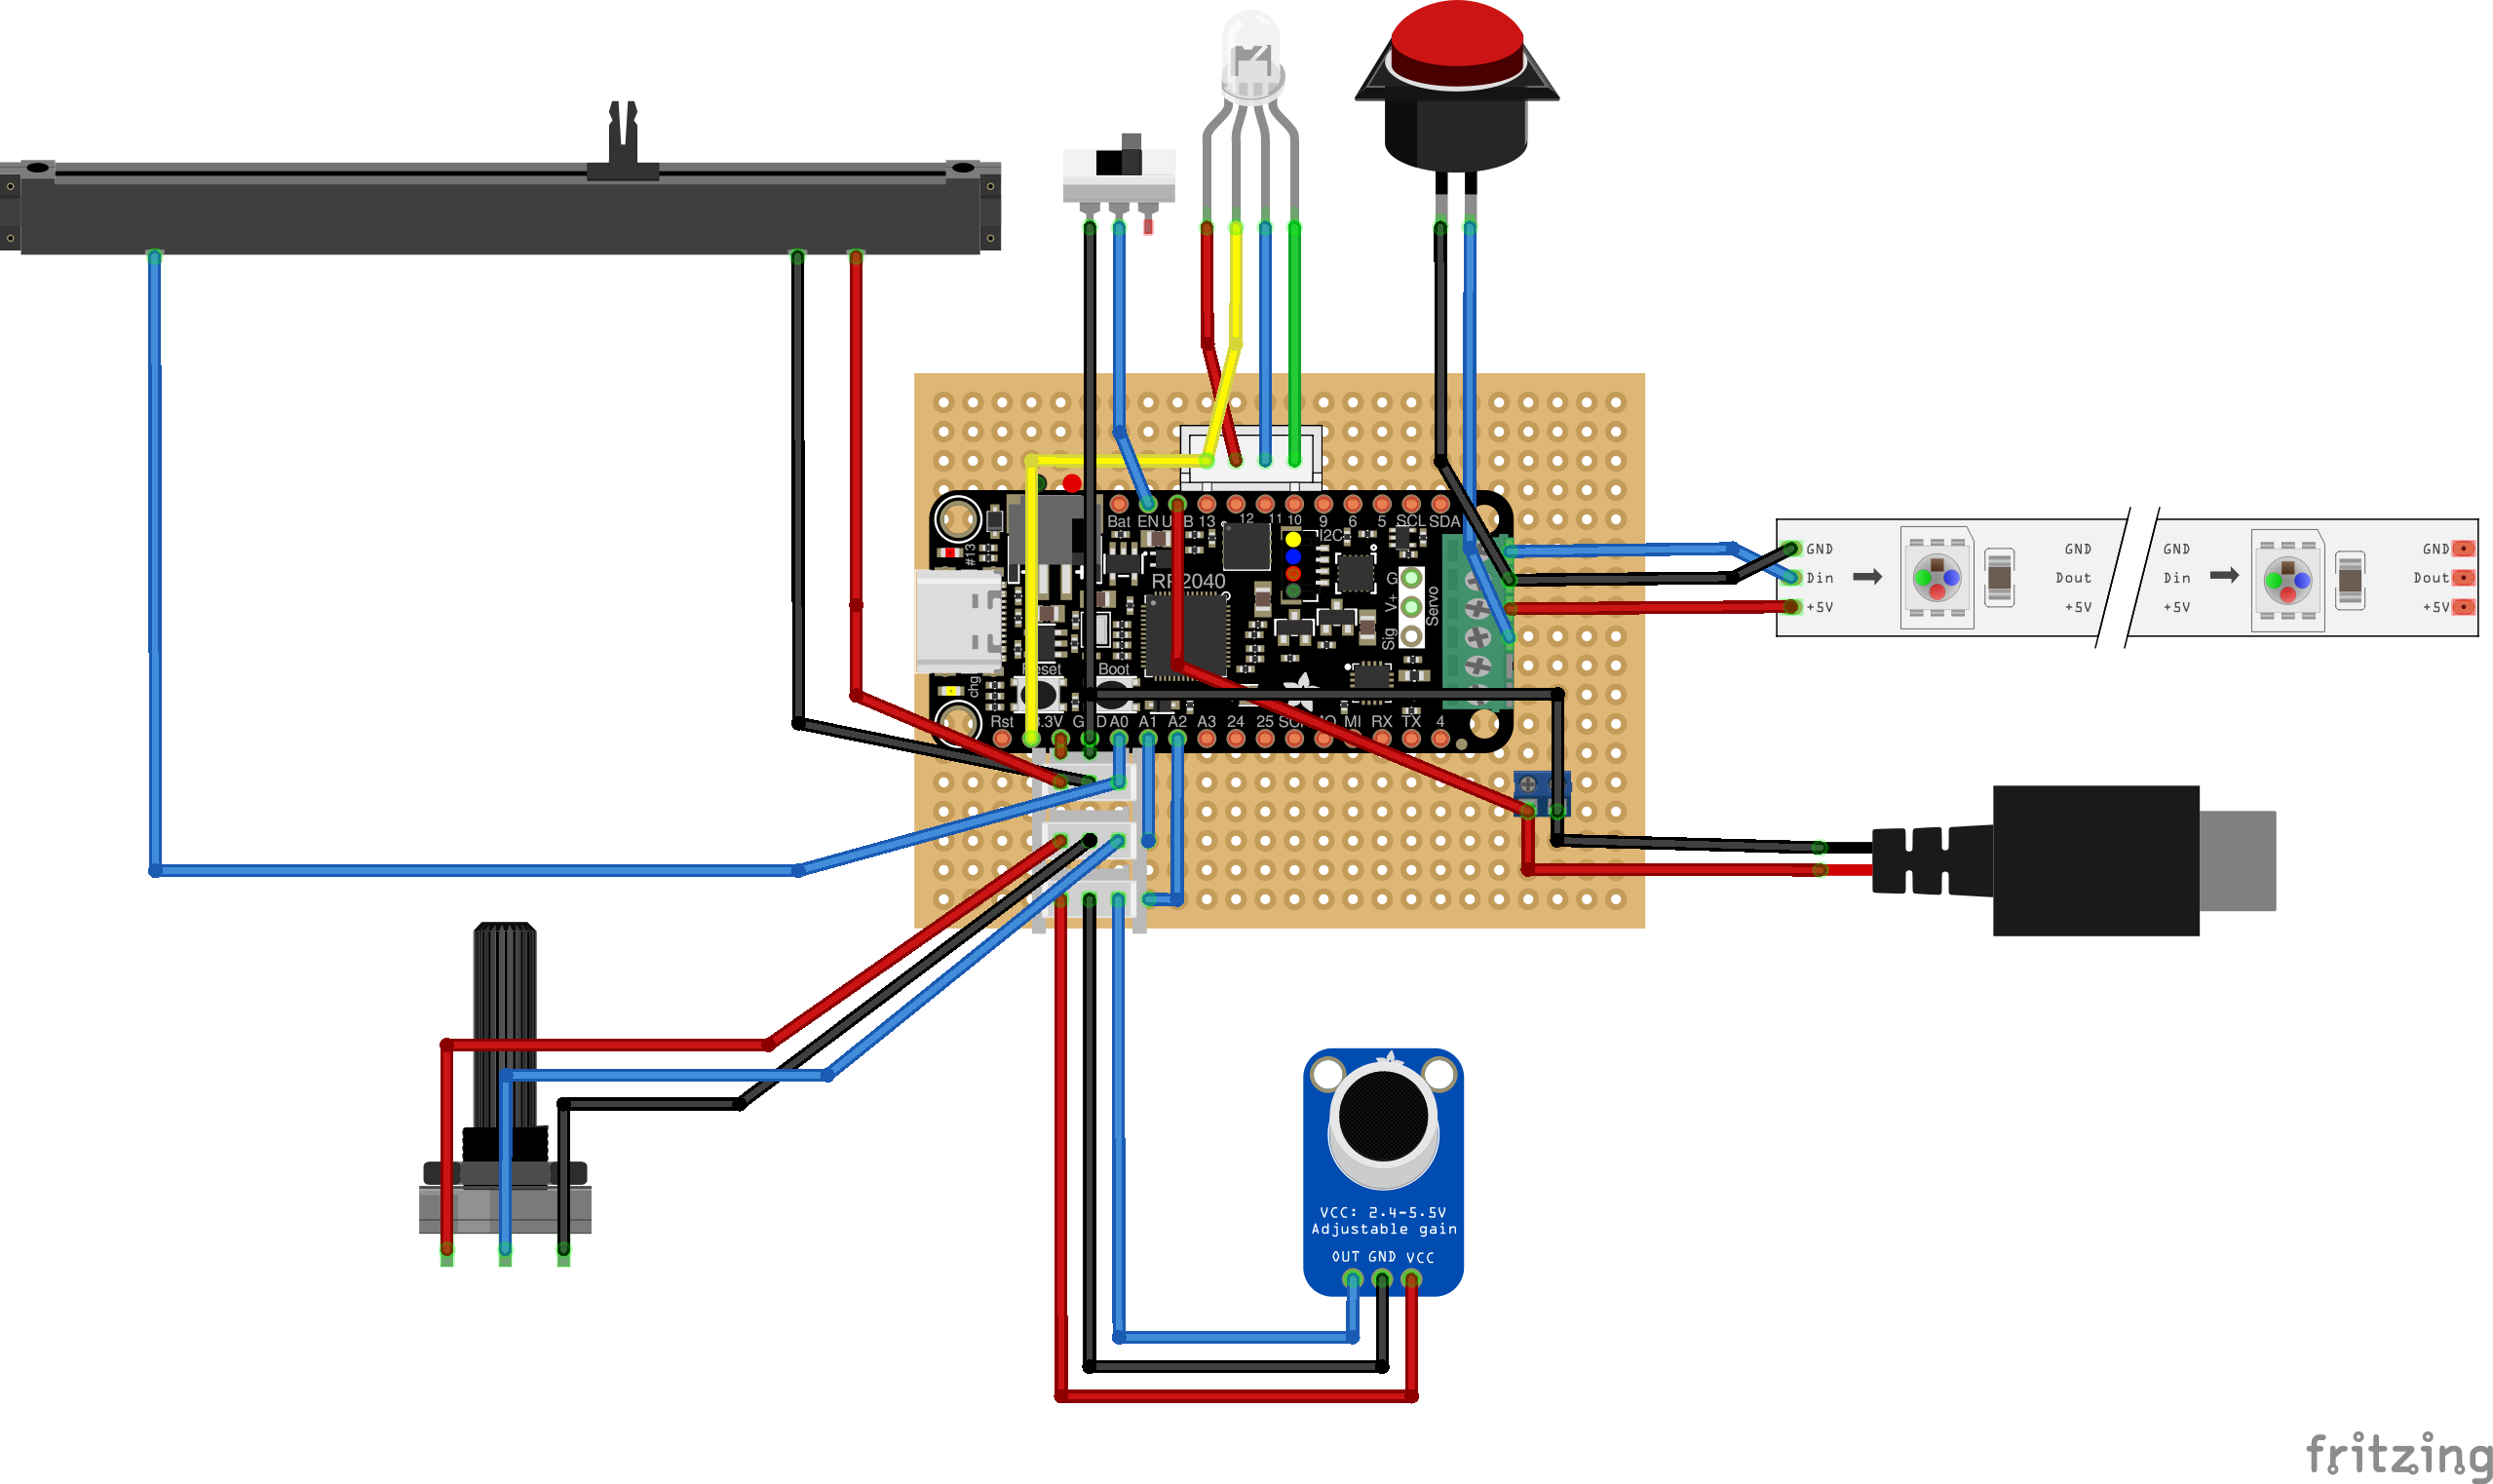
I am an architect at heart, so I really enjoyed creating this diagram. It also made life a lot easier when it came time to solder the components together:
An editable Fritzing file is available on GitHub
Parts
Some parts, like wires and connectors, were available to me at MakerLabs so this isn’t a complete list. But it does contain the key components should you choose to make your own doof stick:
| Name | Price | Link |
|---|---|---|
| RP2040 Prop-Maker Feather | US$20 | Adafruit |
| Mini Skinny NeoPixel RGB LED Strip 1m | US$60 | Adafruit |
| RGB Metal Pushbutton, 16mm 6V Momentary | US$11 | Adafruit |
| Breadboard-friendly SPDT Slide Switch | US$1 | Adafruit |
| Electret Microphone Amplifier - MAX4466 | US$7 | Adafruit |
| Panel Mount 10K potentiometer | US$1 | Adafruit |
| INIU Power Bank, 100W 25000mAh | CA$72 | Amazon |
| Glow in The Dark PETG Filament Blue 1.75mm | CA$44 | Amazon |
| 5V USB Type C PD to DC Power Cable | CA$15 | Amazon |
| USB C Extension Cable | CA$15 | Amazon |
| Straight Slide Potentiometer B10K 75mm | CA$15 | Amazon |
| #6x3/4 Flat Head Sheet Metal Screws | CA$11 | Amazon |
| M2 Screws Bolts various sizes | CA$7 | Amazon |
| Silver One Way Mirror Film, 17.5” x 6.5ft | CA$16 | Amazon |
| Vinyl Squeegee Felt Edge | CA$8 | Amazon |
| PCB Board Prototype Kit | CA$11 | Amazon |
| JST Plug Set | CA$13 | Amazon |
| Threaded Insert Set | CA$27 | Amazon |
| 60-inch Hardwood Pole | CA$13 | Home Depot |
| Transparent Acrylic Disc 300mm x 2mm, 2pcs | CA$28 | AliExpress |
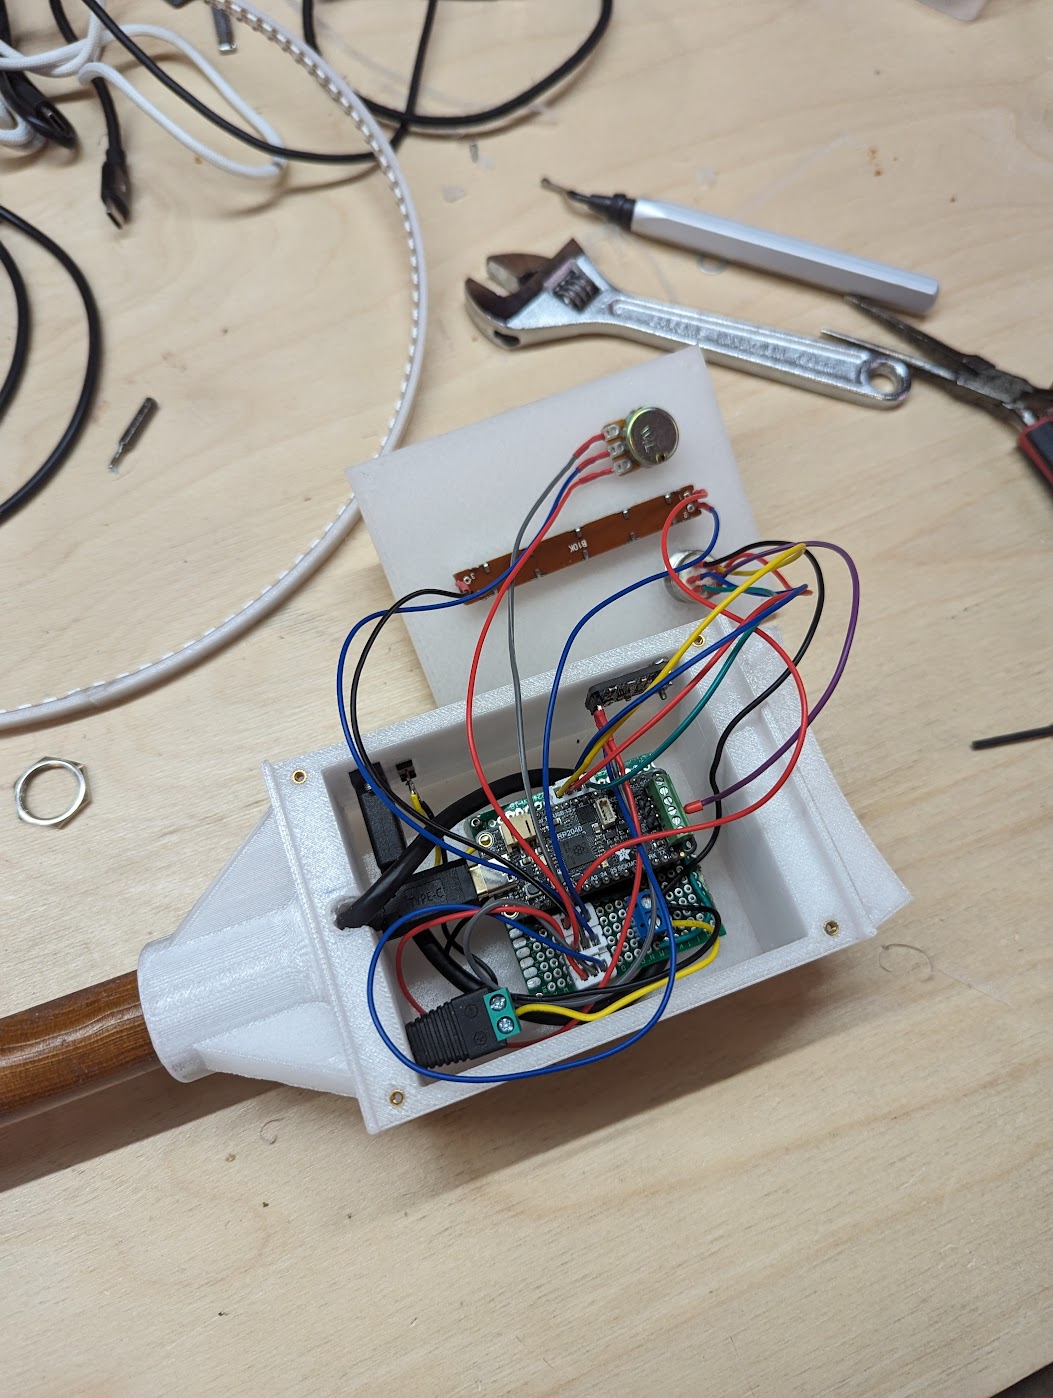
Assembly
The steps I took somewhat follows the Infinity Mirror Coaster assembly instructions. Once all the parts where printed, I still needed to drill out some holes and sand down edges so it could all fit. Before closing it all up, I made sure all of the electrical components were working as expected:
I definitely learned a few lessons about tolerances, and the age old adage of measure twice, cut once. I was really happy with how this all came together, albeit with a bit of elbow grease.
Party
At the end of July last year, some friends were visting my partner and I in Vancouver, and we went to Shambhala Music Festival. It was finally time to take the doof stick for a spin!
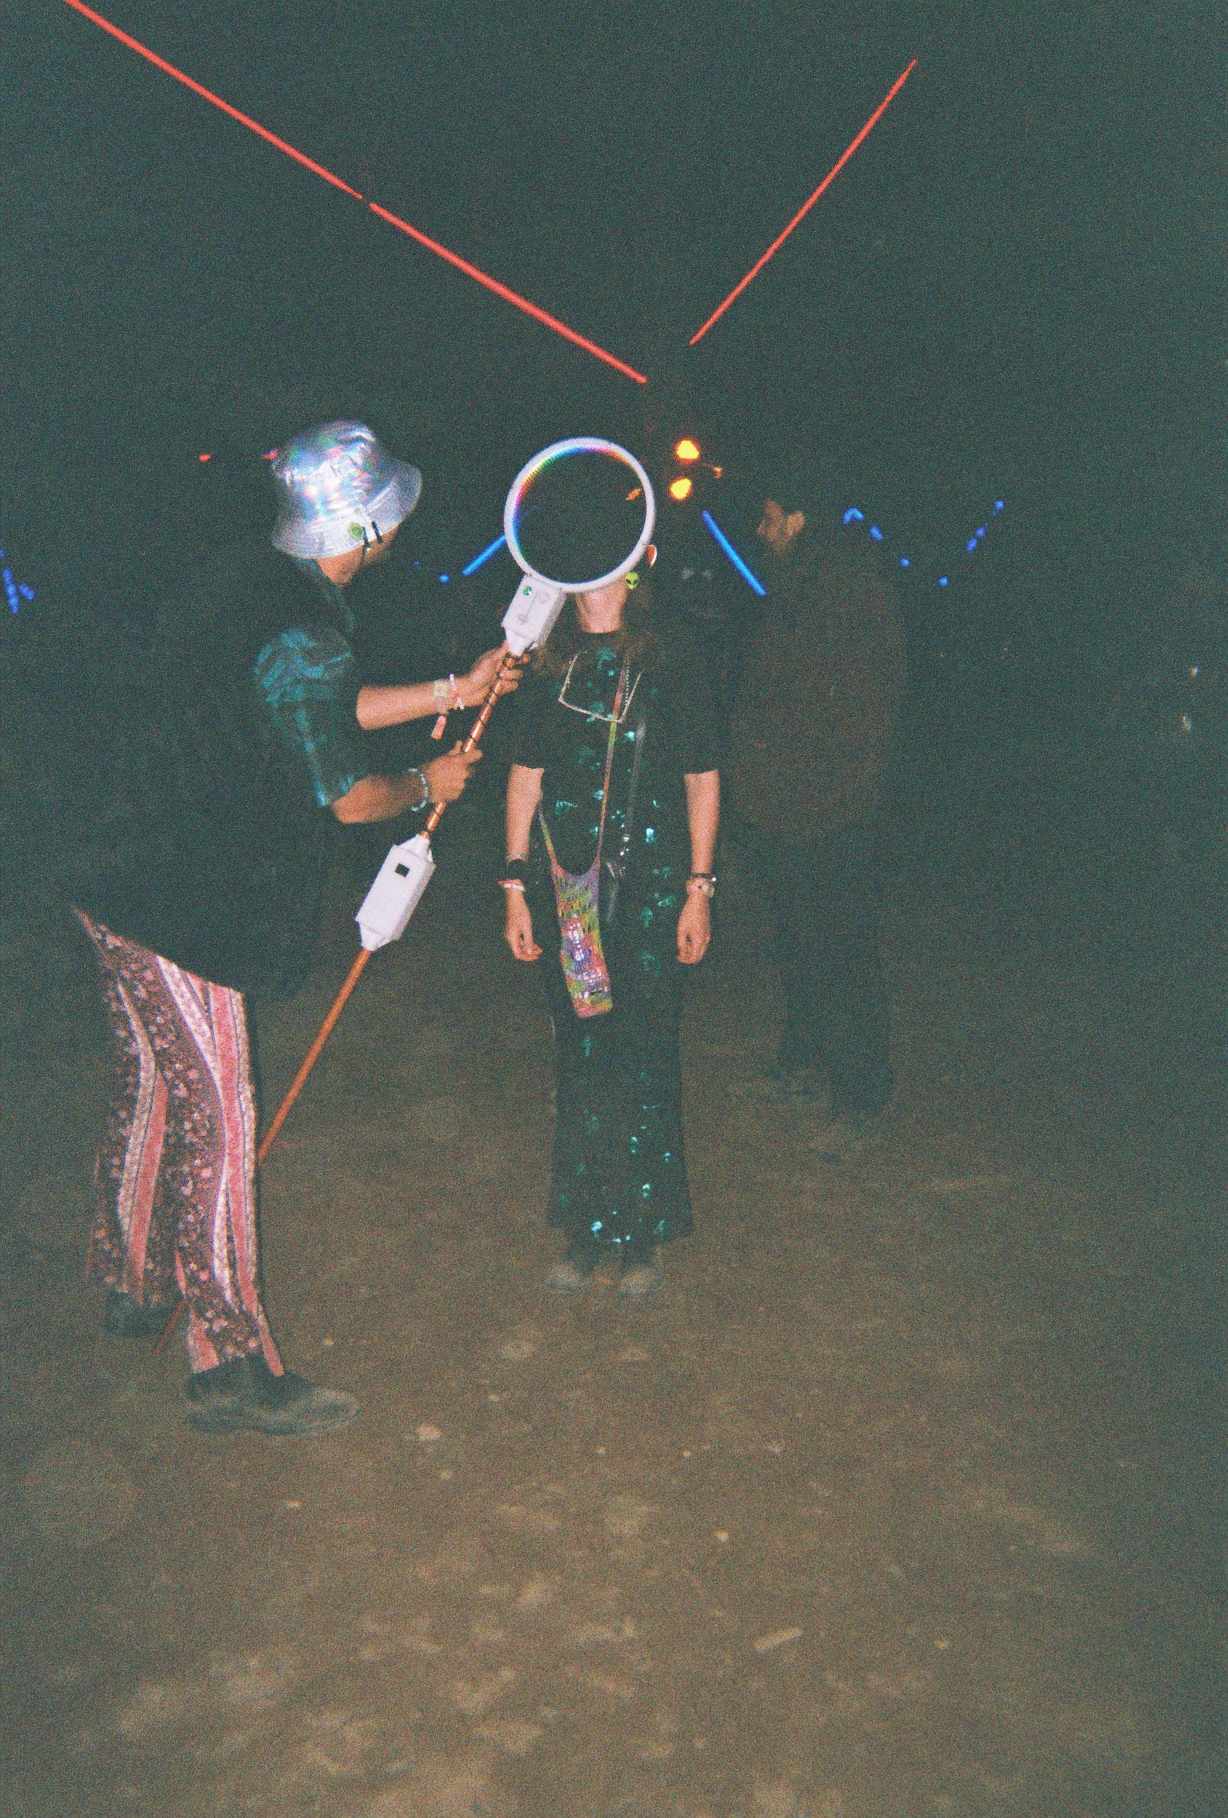
It was hit and a magnet for the electronics nerds out on the dance floor, as plenty of people were chatting my ear off about microcontrollers and 3D printing. It also worked really well - the battery lasted well over two nights before needing to be recharged, and the case held up drops and the wear and tear of the dance floor. I’m looking forward to joining another makerspace soon and working on another project, and I’ll be sure to post more about my next creator experience!